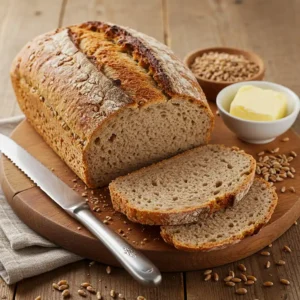
Imagine biting into a slice of bread that’s both hearty and comforting, with a subtle nutty flavor and a pleasantly chewy texture. That’s exactly what you get when you bake Wheatberry Bread. Made from whole wheat or a mix of flours and cooked wheat berries, this loaf offers a delightful balance of taste and nutrition.
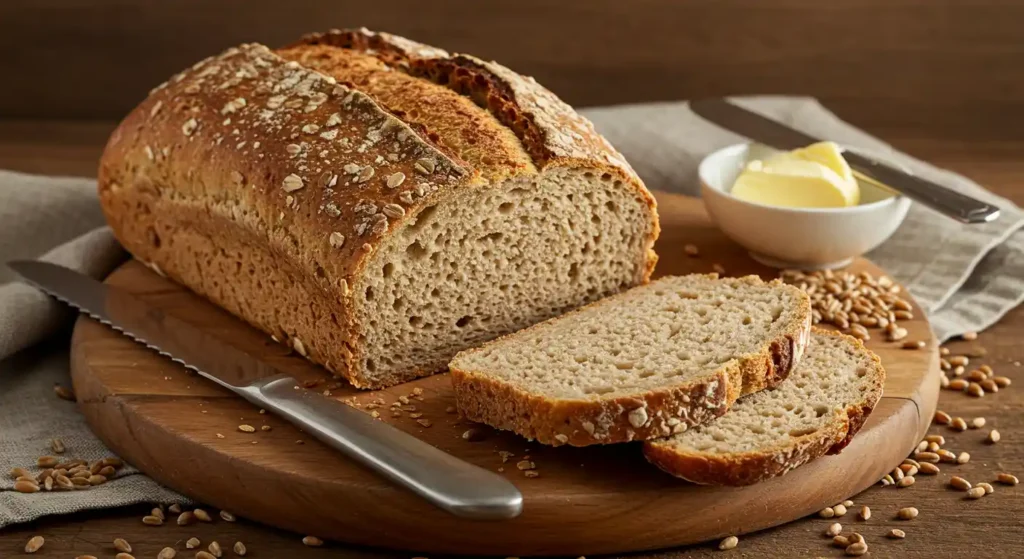
Wheat berries are whole, unprocessed wheat kernels. When incorporated into bread dough, they add a slight crunch and a distinct, grain-forward depth that many home bakers find irresistible. Whether you’re a beginner or an experienced bread maker, Wheatberry Bread is a rewarding project that yields a rich, wholesome loaf perfect for breakfast, sandwiches, or simple snacks.
In this recipe, we’ll explore how to cook wheat berries for maximum tenderness and then fold them into a dough that’s flexible enough for shaping into a rustic boule or a standard loaf. We’ll also discuss tips to keep the dough smooth and elastic, the best way to bake for a crispy crust, and a few easy variations to help you customize the flavor. By the end, you’ll have a recipe that’s as nourishing as it is delicious—ideal for anyone craving a slice of classic home-baked bread with a twist.
Table of Contents
Why You’ll Love This Recipe
From its wholesome ingredients to its satisfying bite, this Wheatberry Bread recipe caters to both your taste buds and your desire for nutritious, homemade meals. Here’s why it stands out:
- Nutty Flavor & Chewy Texture
- The cooked wheat berries bring a subtle crunch and a mild sweetness that’s unique to whole grains. You’ll enjoy a hearty, well-rounded bite in every slice.
- Versatile & Foolproof
- Whether you’re an experienced baker or a newcomer, this loaf is manageable. The dough is easy to knead, and the method is straightforward, making it a confidence booster for anyone looking to hone bread-making skills.
- Health Benefits in Every Slice
- Whole wheat flour and wheat berries are fiber-rich, making this bread a healthier alternative to standard white loaves. It’s a nutrient-dense choice for sandwiches, toast, or snacking.
- Great for Meal Prep
- Homemade bread stays fresh for a few days, and you can freeze slices for quick breakfasts or packed lunches. It’s an excellent base for avocado toast, breakfast sandwiches, or topped with jam.
- Customizable Add-Ins
- Feel free to add seeds, nuts, or dried fruit to play with flavor and texture. If you enjoy a sweeter loaf, a tablespoon of honey or molasses works wonders.
With a robust flavor profile and the nutritional perks of whole grains, this bread is sure to become a staple in your baking repertoire.
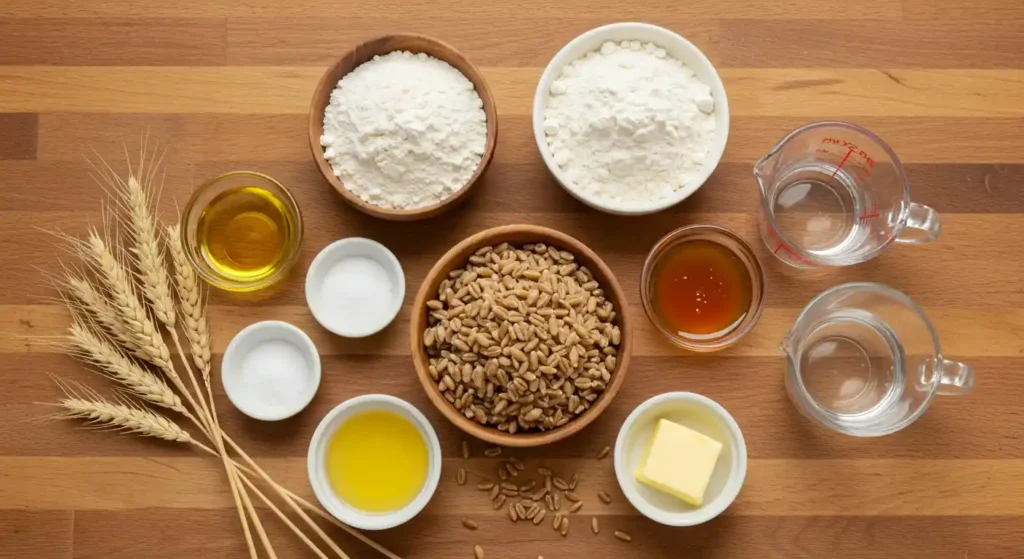
Ingredients
Gathering the right ingredients is key to creating a rich and hearty Wheatberry Bread. You’ll need a mix of whole wheat flour, all-purpose or bread flour, and cooked wheat berries for texture. Below is an overview of what to have on hand.
Core Ingredients
- Wheat Berries
- ½ cup dried wheat berries (white or red variety)
- You’ll cook these before adding them to the dough for a pleasing, chewy texture.
- Flour
- 2 cups bread flour (or all-purpose flour)
- 1 cup whole wheat flour
- This combination ensures a loaf that’s both sturdy and tender.
- Yeast
- 1 packet (2¼ teaspoons) active dry yeast
- You can also use instant yeast; just follow the packet instructions.
- Warm Water
- 1 cup (approximately 110°F)
- This helps activate the yeast and bring the dough together.
- Sweetener (Optional)
- 1 tablespoon honey or brown sugar
- Adds a subtle sweetness and helps with browning.
- Salt
- 1½ teaspoons
- Balances the flavor and strengthens the dough structure.
- Oil or Butter
- 2 tablespoons (olive oil or melted butter)
- Contributes to a moist crumb and softens the loaf.
Optional Add-Ins
- Seeds or Nuts: For extra crunch and protein (e.g., sunflower seeds, pumpkin seeds, or chopped walnuts).
- Molasses or Maple Syrup: To replace honey or brown sugar with a more robust sweetness.
- Flax or Chia Seeds: For added fiber and nutritional value.
With these simple yet powerful ingredients, you can craft a nutty, fiber-rich bread that easily fits into everyday meals.
Instructions
Making Wheatberry Bread involves two main stages: cooking the wheat berries and then preparing the dough with all your chosen ingredients. These steps may appear detailed, but each one is straightforward and results in a nutty, hearty loaf you’ll want to bake again and again.
Step 1: Cook the Wheat Berries
- Rinse the wheat berries under cool water to remove any debris.
- Place ½ cup wheat berries in a small saucepan and add 1½ cups water.
- Bring the liquid to a boil, then immediately reduce the heat to maintain a gentle simmer.
- Cover the saucepan and let the wheat berries cook for 25–30 minutes, or until they’re tender but still slightly chewy.
- Drain any remaining liquid and set the cooked wheat berries aside to cool. This step helps the yeast to become active without overheating and destroying it.
Tip: If you prefer a softer chew, simmer the wheat berries for an extra 5–10 minutes. You can also try white wheat berries or red wheat—both work well in this bread.
Step 2: Bloom the Yeast
- Warm 1 cup of water to around 110°F. This helps activate the yeast without killing it.
- In a large mixing bowl, combine the warm water, 1 tablespoon honey (or brown sugar), and 2¼ teaspoons active dry yeast.
- Let the mixture rest for 5–10 minutes, until it becomes foamy on top. If you see no foam, your yeast may be inactive—try fresh yeast or check the water temperature.
Tip: If using instant yeast, skip the blooming step and add it directly to the dry ingredients, though blooming can still help check if the yeast is viable.
Step 3: Form the Dough
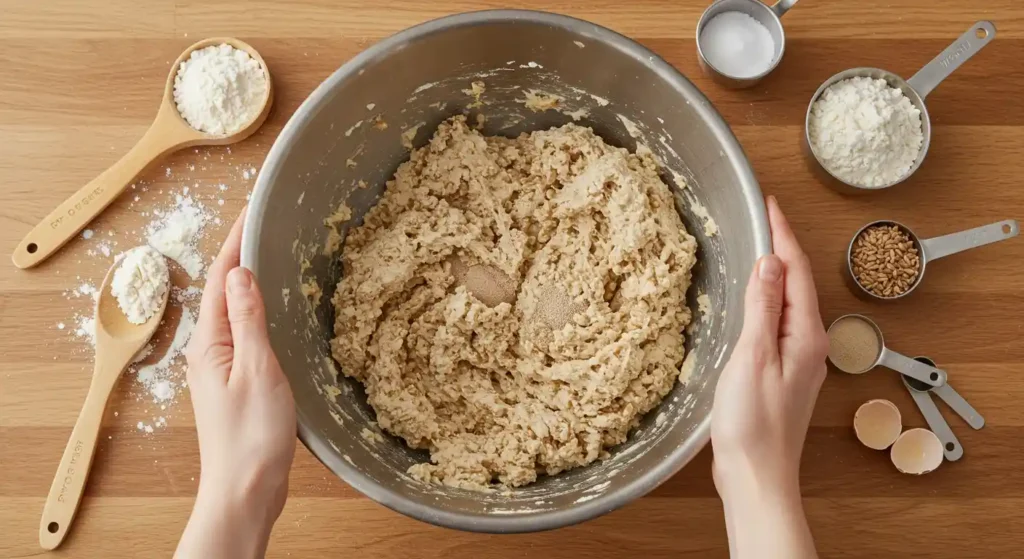
- In a separate bowl, whisk together the 2 cups bread flour (or all-purpose flour), 1 cup whole wheat flour, and 1½ teaspoons salt.
- Gradually add the dry mixture to the yeast mixture, stirring with a wooden spoon or dough whisk.
- Add 2 tablespoons of oil (olive oil or melted butter) as you mix, along with the cooked wheat berries.
- Stir until a shaggy dough forms. If the dough is too sticky to handle, gradually add a small amount of extra flour until it reaches the right consistency. If the mixture seems too dry, incorporate a tablespoon of warm water.
Tip: This step begins to develop the gluten network that helps the loaf hold its shape and achieve a soft crumb.
Step 4: Knead the Dough
- Transfer the dough onto a lightly floured surface.
- Knead the dough for 8–10 minutes, pushing it away with the heel of your hand, folding it over itself, and rotating.
- Continue until the dough is smooth and elastic, showing a slight spring back when pressed.
Tip: To avoid sticking, dust your hands and the work surface with flour sparingly. Too much flour can lead to a dense or dry loaf.
Step 5: Let the Dough Rise (First Rise)
- Lightly oil a clean bowl.
- Place the dough inside, turning it once to coat the surface.
- Cover the bowl tightly with a clean kitchen towel or a sheet of plastic wrap.
- Leave it in a warm, draft-free spot to rise for 60–90 minutes, or until doubled in size.
Tip: An ideal rising temperature is around 75–80°F. If your kitchen is cold, place the bowl inside an unheated oven with the light turned on, or near a warm appliance.
Step 6: Shape and Second Rise
- Punch down dough to release air.
- Transfer it back onto a lightly floured surface.
- Shape the dough into a round boule or a loaf suited for your pan.
- For a loaf pan: grease a 9×5-inch pan. Place the shaped dough inside.
- Cover again and let the dough rise for another 45–60 minutes, or until puffed and just above the rim.
Tip: If you prefer a free-form boule, place it on a parchment-lined baking sheet and cover it for the final rise. Dust the top lightly with flour for a rustic finish.
Step 7: Bake to Perfection
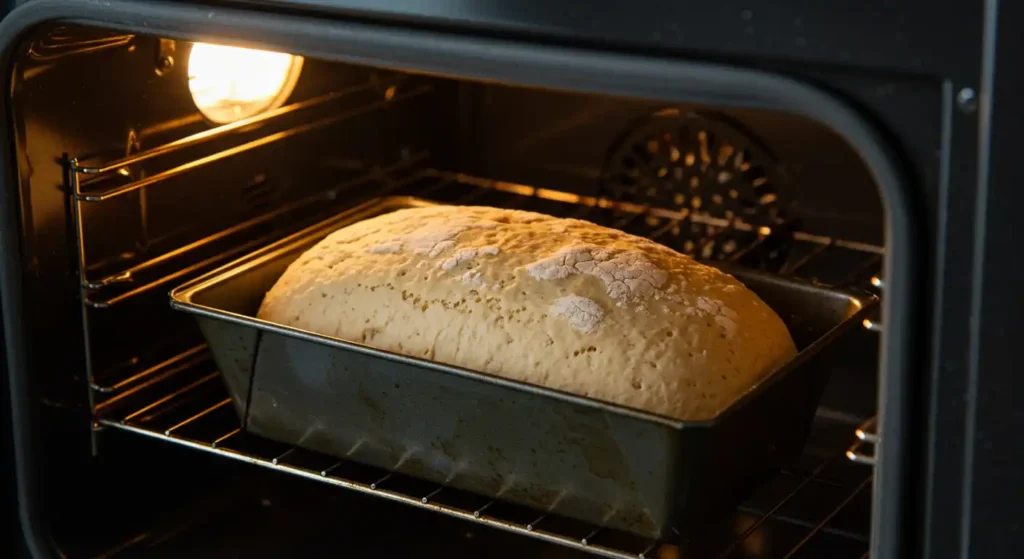
- Preheat your oven to 375°F (190°C). If you’re using a baking stone, place it in the oven during preheating.
- For extra crustiness, score the top of the loaf with a sharp knife.
- Bake for 30–35 minutes, until the crust is golden and the loaf sounds hollow when tapped on the bottom.
- An internal temperature of 200–205°F indicates a fully baked bread.
Tip: Keep an eye on the crust color. If it browns too quickly, tent the loaf with aluminum foil during the last 10 minutes of baking.
Step 8: Cool and Slice
- Remove the bread from the oven and immediately transfer it to a wire rack.
- Let it cool for at least 20–30 minutes before slicing. Cutting too soon can affect the crumb texture.
- Slice with a sharp serrated knife, enjoy fresh, or store in a bag or bread box to maintain freshness.
Tip: Wheatberry Bread also freezes well. Pre-slice, wrap securely, and thaw individual slices as needed.
By following these steps, you’ll end up with a chewy, nutty loaf full of whole grain goodness.
Pro Tips and Variations
Mastering Wheatberry Bread is straightforward, but a few extra tips and creative twists can elevate your loaf and let you explore different flavors and textures. Here are some ways to refine or reinvent this recipe:
Pro Tips for a Perfect Loaf
- Mind the Dough Hydration
- Wheat berries contribute extra moisture to your bread. If your dough feels too sticky, sprinkle in a little more flour. If it’s stiff, add a tablespoon or two of warm water.
- Use Quality Wheat Berries
- Look for fresh, high-quality wheat berries (white or red). Older berries may take longer to cook or yield a tougher bite.
- Experiment with Yeast Types
- Whether you use active dry or instant yeast, ensure it’s fresh. Old or improperly stored yeast won’t give the best rise.
- Embrace Kneading
- Kneading develops gluten, ensuring your bread has structure. Aim for a smooth, elastic dough. If you prefer a hands-off approach, use a stand mixer with a dough hook, but keep an eye on the dough texture.
- Temperature Matters
- Room temperature affects rising. If your kitchen is cold, consider using a proofing box or placing the dough in a slightly warmed oven (just the light on, no heat) to speed things up.
- Don’t Skimp on the Cooling
- Slicing hot bread can compress the crumb and make it gummy. A short wait ensures the loaf sets properly.
Flavor Variations to Try
- Honey Wheat Berry Bread
- Swap sugar for 2 tablespoons of honey and add a bit more water to keep the dough hydrated. Honey brings a subtle sweetness and helps create a caramel-brown crust.
- Cracked Wheat Combination
- Combine cooked wheat berries with ¼ cup cracked wheat for an even more textured, hearty loaf. Soak the cracked wheat in warm water for 10 minutes before adding it to the dough.
- Seeded Wheatberry Bread
- Fold in 2–3 tablespoons of seeds like sunflower, pumpkin, or flax during kneading for extra crunch and nutrition. Lightly toast the seeds beforehand to amplify flavor.
- Multigrain Twist
- Replace ½ cup of the bread flour with other flours (like rye or spelt) to create a complex, multigrain loaf. Adjust the water slightly if the dough feels too dry or stiff.
- Sourdough Starter Infusion
- If you have a sourdough starter, replace part of the yeast with ½ cup of active starter. Adjust flour and liquid as needed, and expect a longer rise time. The tangy notes of sourdough pair nicely with the nutty wheat berries.
- Sweet Cinnamon Swirl
- For a breakfast loaf, roll the dough out after the first rise, spread a thin layer of softened butter and sprinkle cinnamon-sugar, then roll into a log. Proceed with the second rise and bake as directed.
Using these helpful tips and trying out different flavor combinations, you can take this simple Wheatberry Bread recipe and make it your own, creating a bread that reflects your personal style. Whether you keep it simple or spice it up, you’ll enjoy bread that’s just as wholesome as it is delicious.
Serving Suggestions
Wheatberry Bread is as versatile as it is hearty. Its nutty bite and substantial crumb make it a perfect match for both sweet and savory pairings. Whether you’re enjoying a warm slice straight from the oven or saving some for tomorrow’s sandwich, here are a few ideas to inspire you:
1. Simple Toast with Butter or Jam
- A classic option for breakfast or a quick snack. Toast the bread and top with salted butter, fruit jam, or honey. The bread’s nutty flavor pairs well with sweet spreads.
2. Heartier Sandwiches
- Slice the bread lengthwise for a satisfying sandwich base. Layer on smoked turkey, grilled vegetables, or cheese. Its sturdy texture holds up to sauces and dressings without getting soggy.
3. Avocado Toast Upgrade
- Spread mashed avocado over a toasted slice. Add a drizzle of olive oil, a squeeze of lemon, a sprinkle of salt, and a pinch of red pepper flakes or everything bagel seasoning for a gourmet spin.
4. Soup or Stew Companion
- Serve a thick slice alongside hearty soups, stews, or chilis. Dip it to soak up broths, or use it to scoop thick chowders for extra flavor in every bite.
5. Crostini or Bruschetta
- Thinly slice the bread and lightly brush with olive oil. Toast or broil until crisp, then top with tomatoes and basil, goat cheese, or a spread of pesto for a rustic appetizer.
6. Breakfast Egg Strata
- Cut day-old slices into cubes and layer in a baking dish with eggs, milk, cheese, and your favorite breakfast meats or vegetables. Let it soak overnight and bake in the morning for a crowd-pleasing brunch.
7. Bread Pudding Twist
- Repurpose leftover slices into a sweet or savory bread pudding. The wheat berries add texture and flavor to the custard base, making each spoonful a treat.
8. Freezer-Friendly Meal Prep
- Slice the cooled loaf, wrap individual portions, and store them in the freezer. Pop slices in the toaster or oven for a quick, fresh-tasting breakfast or snack any time.
Whether you enjoy Wheatberry Bread for breakfast, lunch, or dinner, its robust flavor and nutritious qualities will leave you satisfied.
Conclusion
This Wheatberry Bread recipe proves that baking with whole grains can be both delicious and approachable. By cooking the wheat berries in advance and blending them into a simple, forgiving dough, you get a loaf with a distinctive nutty sweetness and a comforting chew. It’s a bread that highlights nature’s bounty in every bite—nourishing, hearty, and versatile enough for any meal.
From a slice of toast in the morning to a satisfying sandwich at lunchtime or a soup companion at dinner, this bread delivers texture, flavor, and satisfaction. You also have plenty of room to customize: add your favorite seeds or herbs, try a swirl of cinnamon sugar, or experiment with different flours for a unique twist.
With just a bit of planning and a willingness to knead, you can transform humble wheat berries into a rustic, wholesome loaf. The steps are straightforward, the ingredients are easy to find, and the result is a nutrient-rich bread that you can savor fresh or freeze for later. By following the tips and variations, you’ll be ready to tackle any baking challenge—knowing that Wheatberry Bread stands out for both flavor and nutrition.
Wheatberry Bread
Ingredients
Core Ingredients
- Wheat Berries
- ½ cup dried wheat berries white or red variety
- You’ll cook these before adding them to the dough for a pleasing chewy texture.
- Flour
- 2 cups bread flour or all-purpose flour
- 1 cup whole wheat flour
- This combination ensures a loaf that’s both sturdy and tender.
- Yeast
- 1 packet 2¼ teaspoons active dry yeast
- You can also use instant yeast; just follow the packet instructions.
- Warm Water
- 1 cup approximately 110°F
- This helps activate the yeast and bring the dough together.
- Sweetener Optional
- 1 tablespoon honey or brown sugar
- Adds a subtle sweetness and helps with browning.
- Salt
- 1½ teaspoons
- Balances the flavor and strengthens the dough structure.
- Oil or Butter
- 2 tablespoons olive oil or melted butter
- Contributes to a moist crumb and softens the loaf.
Optional Add-Ins
- Seeds or Nuts: For extra crunch and protein e.g., sunflower seeds, pumpkin seeds, or chopped walnuts.
- Molasses or Maple Syrup: To replace honey or brown sugar with a more robust sweetness.
- Flax or Chia Seeds: For added fiber and nutritional value.
Instructions
Step 1: Cook the Wheat Berries
- Rinse the wheat berries under cool water to remove any debris.
- Place ½ cup wheat berries in a small saucepan and add 1½ cups water.
- Bring the liquid to a boil, then immediately reduce the heat to maintain a gentle simmer.
- Cover the saucepan and let the wheat berries cook for 25–30 minutes, or until they’re tender but still slightly chewy.
- Drain any remaining liquid and set the cooked wheat berries aside to cool. This step helps the yeast to become active without overheating and destroying it.
- Tip: If you prefer a softer chew, simmer the wheat berries for an extra 5–10 minutes. You can also try white wheat berries or red wheat—both work well in this bread.
Step 2: Bloom the Yeast
- Warm 1 cup of water to around 110°F. This helps activate the yeast without killing it.
- In a large mixing bowl, combine the warm water, 1 tablespoon honey (or brown sugar), and 2¼ teaspoons active dry yeast.
- Let the mixture rest for 5–10 minutes, until it becomes foamy on top. If you see no foam, your yeast may be inactive—try fresh yeast or check the water temperature.
- Tip: If using instant yeast, skip the blooming step and add it directly to the dry ingredients, though blooming can still help check if the yeast is viable.
Step 3: Form the Dough
- In a separate bowl, whisk together the 2 cups bread flour (or all-purpose flour), 1 cup whole wheat flour, and 1½ teaspoons salt.
- Gradually add the dry mixture to the yeast mixture, stirring with a wooden spoon or dough whisk.
- Add 2 tablespoons of oil (olive oil or melted butter) as you mix, along with the cooked wheat berries.
- Stir until a shaggy dough forms. If the dough is too sticky to handle, gradually add a small amount of extra flour until it reaches the right consistency. If the mixture seems too dry, incorporate a tablespoon of warm water.
- Tip: This step begins to develop the gluten network that helps the loaf hold its shape and achieve a soft crumb.
Step 4: Knead the Dough
- Transfer the dough onto a lightly floured surface.
- Knead the dough for 8–10 minutes, pushing it away with the heel of your hand, folding it over itself, and rotating.
- Continue until the dough is smooth and elastic, showing a slight spring back when pressed.
- Tip: To avoid sticking, dust your hands and the work surface with flour sparingly. Too much flour can lead to a dense or dry loaf.
Step 5: Let the Dough Rise (First Rise)
- Lightly oil a clean bowl.
- Place the dough inside, turning it once to coat the surface.
- Cover the bowl tightly with a clean kitchen towel or a sheet of plastic wrap.
- Leave it in a warm, draft-free spot to rise for 60–90 minutes, or until doubled in size.
- Tip: An ideal rising temperature is around 75–80°F. If your kitchen is cold, place the bowl inside an unheated oven with the light turned on, or near a warm appliance.
Step 6: Shape and Second Rise
- Punch down dough to release air.
- Transfer it back onto a lightly floured surface.
- Shape the dough into a round boule or a loaf suited for your pan.
- For a loaf pan: grease a 9×5-inch pan. Place the shaped dough inside.
- Cover again and let the dough rise for another 45–60 minutes, or until puffed and just above the rim.
- Tip: If you prefer a free-form boule, place it on a parchment-lined baking sheet and cover it for the final rise. Dust the top lightly with flour for a rustic finish.
Step 7: Bake to Perfection
- Preheat your oven to 375°F (190°C). If you’re using a baking stone, place it in the oven during preheating.
- For extra crustiness, score the top of the loaf with a sharp knife.
- Bake for 30–35 minutes, until the crust is golden and the loaf sounds hollow when tapped on the bottom.
- An internal temperature of 200–205°F indicates a fully baked bread.
- Tip: Keep an eye on the crust color. If it browns too quickly, tent the loaf with aluminum foil during the last 10 minutes of baking.
Step 8: Cool and Slice
- Remove the bread from the oven and immediately transfer it to a wire rack.
- Let it cool for at least 20–30 minutes before slicing. Cutting too soon can affect the crumb texture.
- Slice with a sharp serrated knife, enjoy fresh, or store in a bag or bread box to maintain freshness.
- Tip: Wheatberry Bread also freezes well. Pre-slice, wrap securely, and thaw individual slices as needed.
Notes
Nutrition Information (Per Serving)
- Calories: 180
- Total Fat: 3g
- Saturated Fat: 1g
- Cholesterol: 0–5mg
- Sodium: 210mg
- Carbohydrates: 33g
- Dietary Fiber: 4g
- Sugars: 2g
- Protein: 6g
FAQs
Below are concise answers to common questions about wheat berries and wheatberry bread, ensuring you have all the information you need before baking.
1. What does wheatberry taste like?
Wheatberries have a mildly nutty flavor with a subtle sweetness. When cooked, they develop a pleasant, chewy texture that adds extra heartiness to bread dough and whole grain salads.
2. Is Wheatberry bread good for you?
Yes, Wheatberry Bread offers both flavor and nutrition. It includes fiber-rich wheat berries, which can help support healthy digestion. Whole grains also contain vitamins, minerals, and antioxidants, making this loaf a nutritious choice compared to many white breads.
4. Is it OK to eat wheat bread everyday?
For most people, moderation is key. Eating whole grain breads like Wheatberry Bread regularly can be part of a balanced diet, especially if you vary your grain choices. If you have specific dietary concerns or gluten sensitivities, consult a healthcare professional.
5. Is wheat berry bread gluten free?
No, wheat berry bread is not gluten-free. Wheat berries come from the wheat plant, which naturally contains gluten. If you need a gluten-free bread, you’ll need to use alternative flours and grains that do not include gluten.
7. Are wheat berries hard to digest?
Most people digest wheat berries well when they’re cooked thoroughly, as heat helps soften the grains. However, if you have certain digestive issues or gluten intolerance, you may need to limit your intake or explore alternative grains.
Armed with these insights, you’re ready to create and enjoy Wheatberry Bread with confidence. Whether you’re seeking a nutrient-packed loaf or just love the nutty bite, this recipe brings whole grains to your table in a satisfying, approachable way.