There’s something magical about desserts that come together without firing up the oven. I discovered this brownie refrigerator cake recipe during a particularly brutal summer heatwave when my kitchen felt like a sauna. One bite and I knew this sinful chocolate dessert would become my go-to for birthdays, potlucks, and those moments when picky eaters need convincing that dessert is worth finishing their dinner.
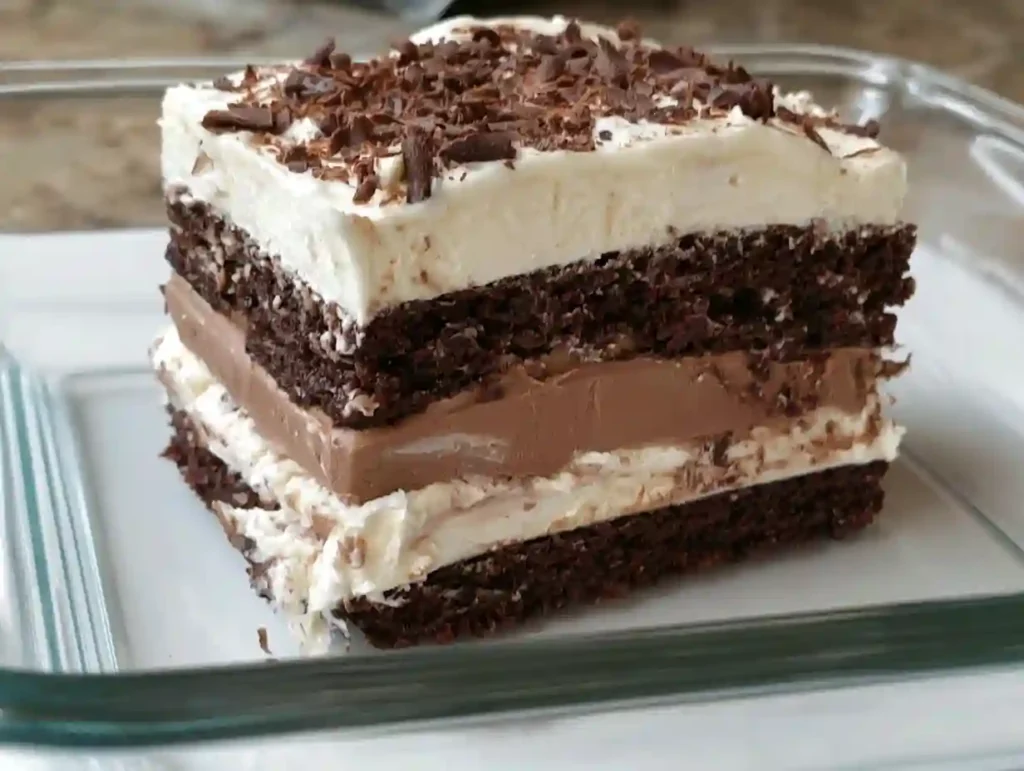
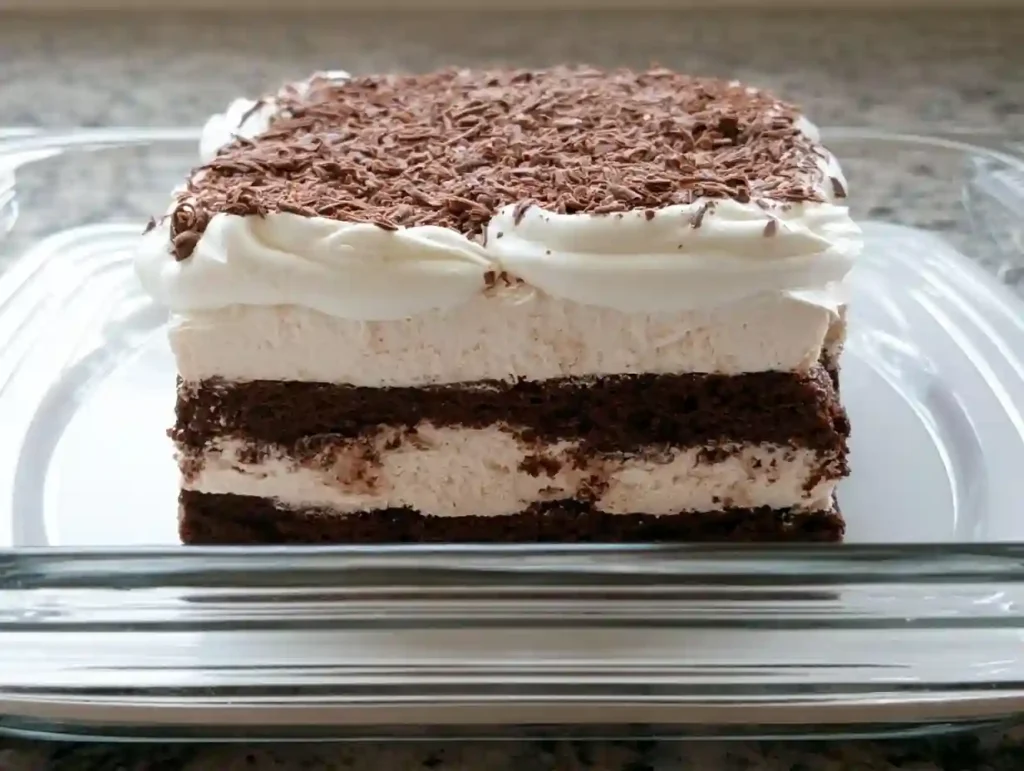
What makes this chocolate brownie dessert special is the layer upon layer of texture. You start with a fudgy triple chocolate brownie base that’s dense enough to hold everything up. Then comes a silky cream cheese layer that cuts through the richness. The chocolate pudding adds that nostalgic comfort food vibe, and the final Cool Whip topping makes it light enough that you’ll find yourself going back for seconds. This overnight dessert recipe actually gets better as it sits, making it perfect for planning ahead.
I’ve made this easy dessert with Cool Whip for everything from simple birthday desserts to last-minute dinner parties. The beauty lies in its simplicity. You’re essentially building a chocolate lover’s dream without any fancy techniques or hard-to-find ingredients. Even desserts with dark chocolate skeptics in my family have asked for the recipe after one taste. Let me walk you through how to make this chocolate dessert that’s become my signature.
What Makes This Brownie Refrigerator Cake Work
The secret to any great refrigerator cake is understanding how the layers interact. Your brownie base needs to be sturdy but still moist. That’s why adding an extra egg to the box mix makes all the difference. It gives you that cake-like texture that soaks up the cream cheese layer beautifully without falling apart.
Temperature matters more than you’d think. Letting that brownie cool completely before adding the cream cheese mixture prevents everything from sliding around. I’ve learned this the hard way when my cream cheese layer turned into soup because I got too excited. Patience here means cleaner slices and happier guests.
The pudding layer is where you can really customize this dessert for picky eaters. Stick with chocolate if you want that triple chocolate brownie experience, or mix vanilla and chocolate for something a bit different. The key is whisking it until it’s thick enough to hold its shape but still spreadable.
Ingredients You’ll Need
- 1 box brownie mix (9×13 inch pan size) plus eggs, oil, and water called for on package
- 1 extra large egg (in addition to what the brownie mix requires)
- 1 package cream cheese, 8 ounces, softened to room temperature
- 1 cup powdered sugar, sifted
- 2 containers whipped topping like Cool Whip, 8 ounces each, thawed
- 1 package chocolate instant pudding mix, 3 ounces
- 1 package vanilla instant pudding mix, 3 ounces
- 3 and 1/2 cups cold milk
- 1 Hershey bar or chocolate syrup for drizzling on top
- Mini chocolate chips for garnish (optional)
Step-by-Step Instructions
Start by preheating your oven according to the brownie mix directions. Grease a 9×13 inch baking pan thoroughly. Mix your brownie batter following package instructions, then crack in that extra egg. This is what transforms your brownies from dense and fudgy to something that can support all those gorgeous layers.
Bake the brownies until a toothpick comes out with just a few moist crumbs. Don’t overbake here or you’ll lose that fudgy texture that makes this chocolate dessert so irresistible. Let them cool completely in the pan. I usually pop mine in the fridge for about 20 minutes to speed things along.
While those brownies cool, beat your softened cream cheese with the powdered sugar until smooth and fluffy. Fold in one container of that whipped topping gently. You want to keep as much air in there as possible. Spread this mixture evenly over your cooled brownies.
Now for the pudding layer. Whisk both pudding mixes with the cold milk for about two minutes until thick. Pour this over the cream cheese layer and spread it out carefully. Top with your remaining whipped topping, spreading it all the way to the edges. Finish with chocolate shavings or a drizzle of chocolate syrup.
Cover everything tightly and refrigerate for at least 4 hours, though overnight desserts like this really shine after 8-12 hours. The flavors meld together and those layers set up beautifully.
Pro Tips for Perfect Results
Room temperature cream cheese is non-negotiable. Cold cream cheese will give you lumps that no amount of beating will fix. Take it out an hour before you start, or microwave it in 10-second bursts until it yields to gentle pressure.
Use cold milk for your pudding. Warm milk won’t set properly and you’ll end up with a runny mess. I keep a carton in the back of my fridge specifically for pudding and custards.
Cover your cake tightly while it chills. This prevents that weird fridge taste from seeping in and keeps the top from drying out.
Variations to Try
Swap the chocolate pudding for banana or butterscotch if you want to change things up. The cream cheese layer can handle pretty much any flavor combination you throw at it. For desserts with dark chocolate lovers, use a premium dark chocolate brownie mix and garnish with dark chocolate shavings.
Add a layer of crushed Oreos between the brownie and cream cheese for extra crunch. Or fold some mini marshmallows into the whipped topping for a s’mores vibe. This easy dessert is incredibly forgiving.
Troubleshooting Common Issues
If your layers are sliding around, your brownies were probably still warm when you added the cream cheese. Next time, let them cool longer. You can salvage a sliding cake by freezing it for 30 minutes before serving.
Runny pudding means either warm milk or not enough whisking time. Make sure you’re hitting that full two minutes and watching for the mixture to thicken noticeably.
Ingredient Substitutions
Don’t have Cool Whip? Homemade whipped cream works beautifully. Just stabilize it with a tablespoon of powdered sugar and a splash of vanilla. For a lighter version, use sugar-free pudding mixes and light whipped topping.
Gluten-free brownie mixes work perfectly here. Just follow the package directions and add that crucial extra egg. The rest of the ingredients are naturally gluten-free.
Storage and Serving Suggestions
This brownie refrigerator cake keeps beautifully in the fridge for up to 3 days. Cover it tightly with plastic wrap or store it in an airtight container. The flavors actually improve on day two, making this perfect for meal prep.
Serve it cold straight from the fridge. Use a sharp knife dipped in hot water for clean cuts. Wipe the blade between each slice for picture-perfect portions. This chocolate dessert pairs wonderfully with fresh berries or a dollop of extra whipped cream.
Frequently Asked Questions
Can I make this brownie refrigerator cake ahead of time?
Absolutely. This overnight dessert recipe actually benefits from being made a day in advance. The layers set up beautifully and the flavors deepen.
Why did my cream cheese layer separate?
This usually happens when the cream cheese wasn’t soft enough or the brownies were still warm. Make sure both are at the right temperature before assembling.
Can I freeze this chocolate dessert?
While you can freeze it, the texture changes slightly. The whipped topping may become grainy. It’s best enjoyed fresh from the refrigerator.
How do I get clean slices?
Use a sharp knife dipped in hot water, wiping it clean between each cut. This prevents the layers from smearing and gives you those Instagram-worthy pieces.
Can I use homemade brownies instead of a mix?
Yes, though box mixes tend to be sturdier for this application. If using homemade, make sure they’re dense enough to support the layers.
What’s the best way to transport this dessert?
Keep it in the original 9×13 pan and cover tightly. Transport it in a cooler with ice packs if you’re traveling more than 30 minutes. This simple birthday dessert travels well when kept cold.
Brownie Refrigerator Cake

Equipment
- 9×13-inch baking pan
- Electric mixer
- Large mixing bowls
- Whisk
- Spatula
Ingredients
- 1 box brownie mix (9×13 inch pan size) plus eggs, oil, and water called for on package
- 1 large egg extra, in addition to package requirements
- 8 ounces cream cheese softened to room temperature
- 1 cup powdered sugar sifted
- 16 ounces whipped topping (Cool Whip) thawed, divided
- 3 ounces chocolate instant pudding mix
- 3 ounces vanilla instant pudding mix
- 3.5 cups cold milk
- 1 bar Hershey bar or chocolate syrup for topping
- 2 tablespoons mini chocolate chips optional garnish
Instructions
- Preheat oven according to brownie mix directions. Grease a 9×13 inch baking pan. Prepare brownie batter following package instructions, adding 1 extra egg to the mix.
- Bake brownies until a toothpick inserted comes out with moist crumbs, about 30-35 minutes. Cool completely in the pan, about 1 hour.
- In a large bowl, beat softened cream cheese with powdered sugar until smooth and fluffy, about 2-3 minutes.
- Gently fold in 1 container (8 oz) whipped topping until well combined. Spread evenly over cooled brownies.
- In another bowl, whisk together chocolate pudding mix, vanilla pudding mix, and cold milk for 2 minutes until thickened.
- Pour pudding mixture over cream cheese layer and spread carefully to cover completely.
- Spread remaining 8 oz whipped topping over pudding layer, extending to the edges of the pan.
- Top with chocolate shavings or drizzle with chocolate syrup. Sprinkle with mini chocolate chips if desired.
- Cover tightly with plastic wrap and refrigerate for at least 4 hours, preferably overnight (8-12 hours) for best results.
- Cut into squares using a sharp knife dipped in hot water. Wipe blade between cuts for clean slices. Serve cold.
Notes
- Make sure cream cheese is fully softened to avoid lumps in the cream cheese layer
- Use cold milk for pudding to ensure proper thickening
- Brownies must be completely cool before adding cream cheese layer to prevent sliding
- This dessert actually improves overnight as flavors meld together
- Store covered in refrigerator for up to 3 days
- For cleaner slices, use a sharp knife dipped in hot water and wiped between cuts